02 Aug 2015
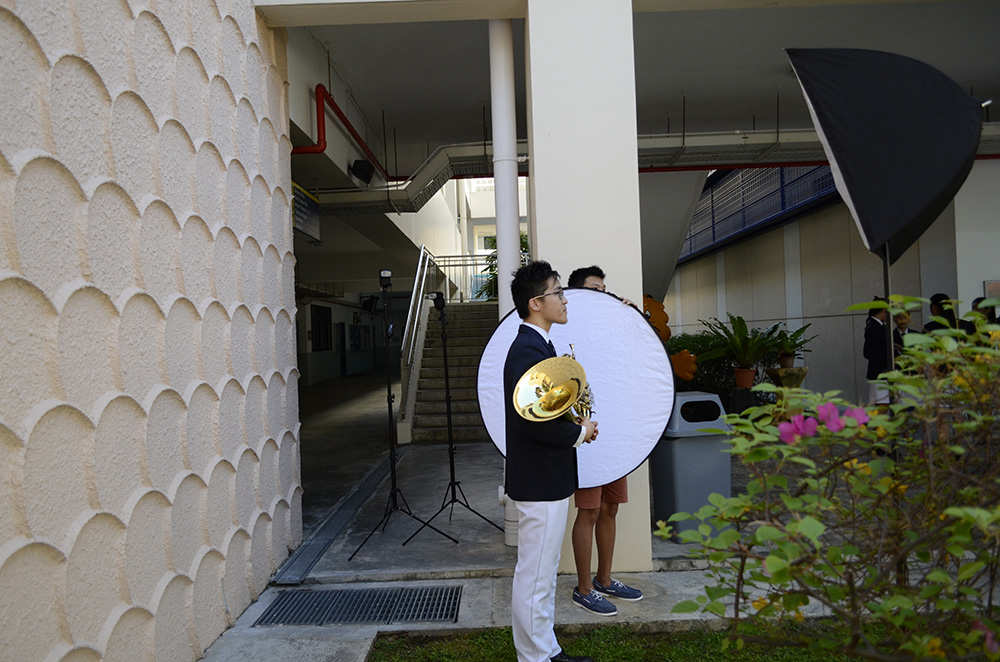
Reunion show is finally over. I have uploaded this set of works, titled “Mathematics”, to this website, and it can be viewed under “Personal Works”.
I am really thankful for the opportunity to exhibit this set of works, a byproduct of 6 months worth of planning. Talking to fellow JSH photographers has made me acknowledge that this set of works is by no means complete - I still have a lot more knowledge to acquire and so, with time, I hope that a more enlightened understanding will help me to make this set of works more holistic.
Mathematics may not the most fascinating thing to put into pictures, but it’s something that has radically changed the way I think and my outlook of life ever since I started university. Hence, it means a lot to me. So, I thought I’d try turning it into a body of work. To be honest, when I initially told the mentor, Joe, of what I planned to do, I wasn’t sure if I could pull it off. Besides being stuck with lack of creativity, another obstacle was finding the balance between aesthetics and technicality. In the first place, would people even be interested to know about Math, or what I have to say about it?
It took me many months of thinking before I could finally settle and draft out what I would like the final product to look like. I sincerely hope that people will be able to appreciate it, although it is rather abstract.
I also hope to produce more sets of personal works, so keep a lookout for any projects that I will be embarking on!
03 Dec 2014
I admit, this is a super backdated post. It was shot about 6 months ago.
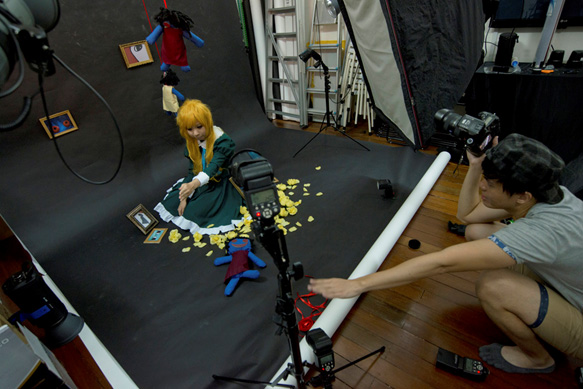
Probably one of the first few shoots I attempted playing with smoke cakes. There’s always a first time for everything - I used too much smoke cake and created a cloud too thick that we couldn’t see much for awhile.
In case you were wondering about my lighting setup:
-
a red-gelled flash was put behind the smoke (smoke is whitish-grey color initially)
-
A 80x80cm softbox to the right of the picture to light up the subject
24 Jul 2014
I must say that shooting with Jencus was quite an eye-opener, and really cool at the same time.
I’ve never seen someone working with so many strobes and flashes at one go - to be precise, 3 strobes and 4-5 flashes. All of the flashes were precisely controlled with circular honey comb/coloured gels/narrow zooms/etc/etc.
I’m not saying it’s bad to just go with one main light, diffused with a giant softbox. However, understanding the technicalities of light and knowing what you want to light up/eliminate sometimes requires one to go with more complicated light setups.
Of course, such an endeavour requires much patience and experience.
07 Jul 2014
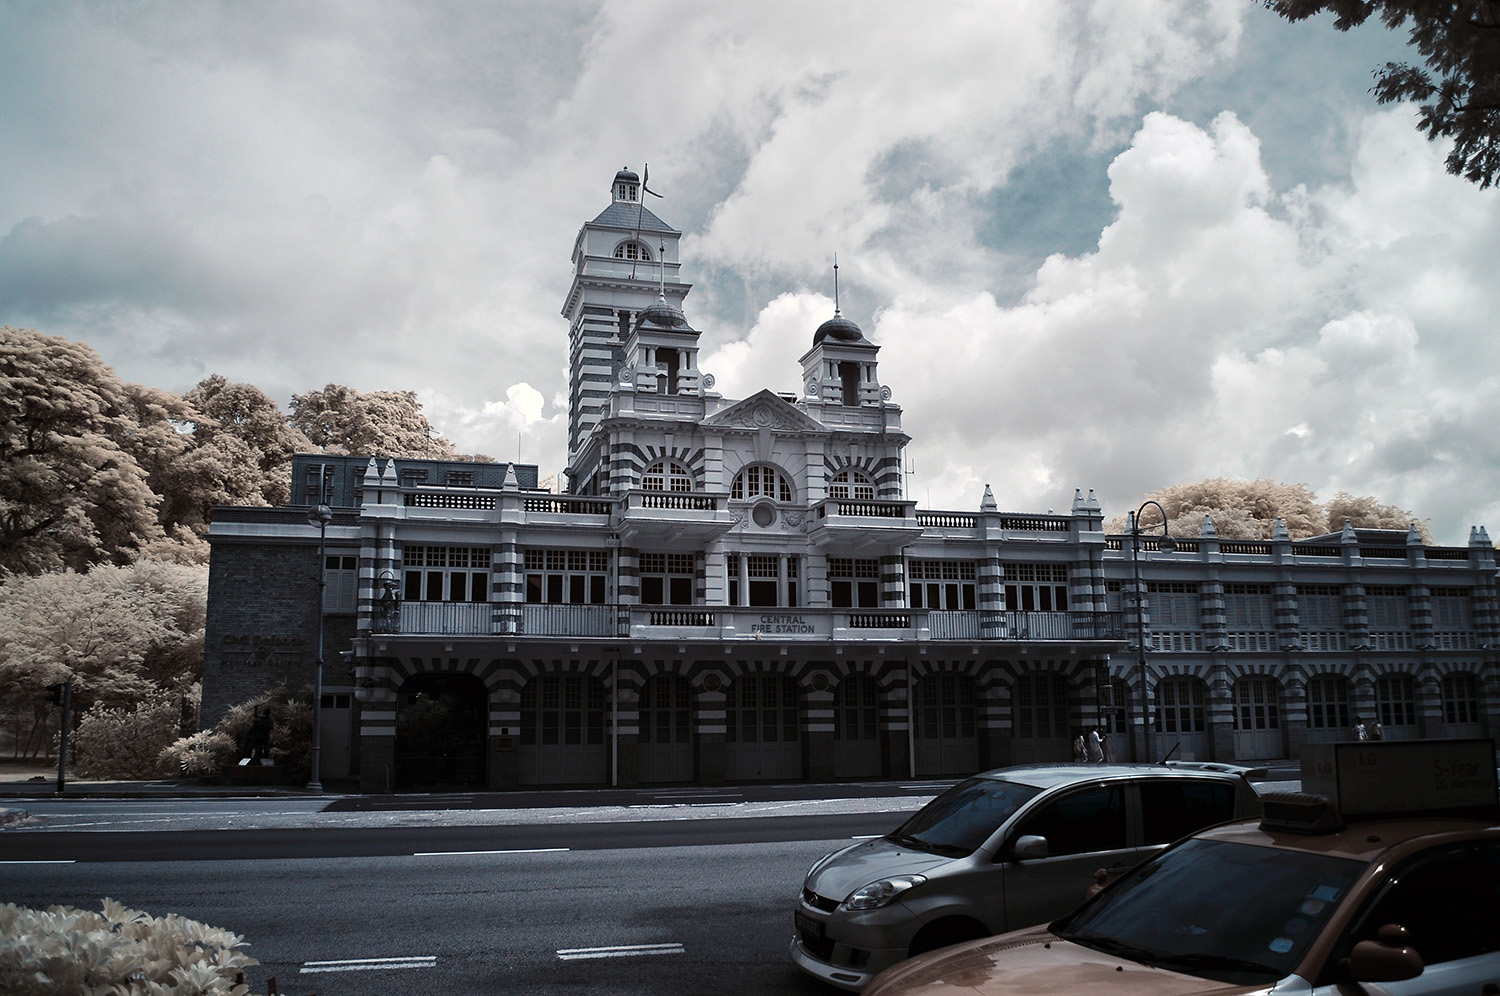
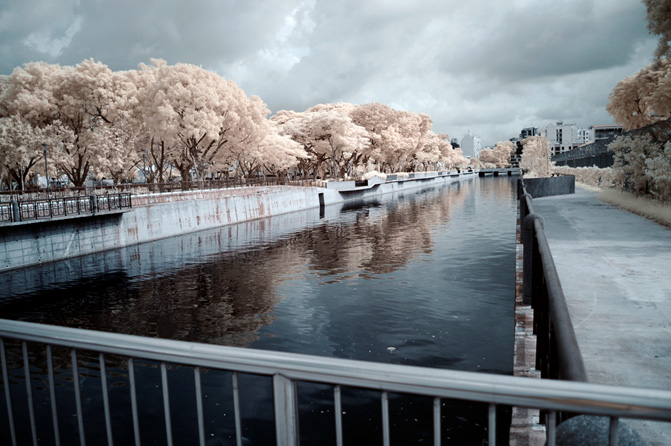
Managed to borrow an IR720nm-modded D300 from a friend and thus, decided to play around with it. It’s really really fun to see cool colours coming out after swapping the channel colours in photoshop.
11 Jun 2014
“Hey, you interested to try taking pictures of Tyersall with me?”
It was a wild chance when I decided to ask my colleague this. Tyersall house, more famously known as the Istana Woodneuk, wasn’t exactly a very accessible place to go to. I didn’t really know what I was doing, but I was game for a challenge on finding something remotely ulu.
To be honest, I wasn’t really prepared for anything. Well, maybe I thought I was, but maybe I wasn’t. The fact that we had to walk through a steep forest, coupled with the fact that we didn’t exactly have a map to follow…
Furthermore, the steep slopes were slippery, with loose/muddy soil, dense vegetation and lose branches all over.
Well, I tried, but I guess I’m no good at this sort of thing - climbing slopes. Certainly I’m way too much of a city dweller. Anyhow, it was quite the experience. We finally reached the place after much difficulty.
Seeing the place filled me with awe, although I was really quite shagged. Don’t ask me what I was doing when I brought my 50mm along to shoot landscapes. I just thought I’d try something different, with, of course, disastrous results. But still, it was worth the hike up. A different side of Singapore rarely seen by most of us, but it was definitely beautiful.
02 May 2014
3 days of being an assistant and “behind the scenes” shooter for the panda. I did learn a lot from his lighting setup and the way he shoots in general.
For one, his setups look kinda complicated at first. But I started to see the pattern of where he was placing the lights, especially in the classrooms. And making good use of the fact that we had white classroom ceilings and walls. Bouncing light in all the right places.
Secondly, the way he directs his subject makes me think a lot as well. He has many clear, easy to follow instructions and ideas to make a posed look look really natural. Sometimes the subjects may look too stiff when asked to pose. Solution to the problem?
“Close your eyes, on the count of three, pop them open and give me a wide smile!”
Sounds cheesy but works 80% of the time :)
Thirdly, how he communicates with the people who want the photos. Much poise really.
30 Mar 2014
Setup for the day:
As a long time user of the Yongnuo 560 flash, I was skeptical that a Godox 360 can make a lot of difference to a photo in broad daylight. Afterall, the yongnuo flash is both cheap and good, and has served me well. The Godox on the otherhand, was about $600 more than the yongnuo!
Lessons Learnt:
-
That difference of a few stops of guide number makes a HUGE difference. Godox 180: GN60 @ 28mm, Godox 360: GN80 @ 28mm, YN-560 : GN58 @ 105mm. One Godox can fight the sun whereas the YN-560 alone couldn’t. You might probably need about 9-13 yongnuos to do so.
-
The Godox leaves a much nicer ‘catchlight’ in the eyes and spectacles. When the Godox was tested against someone wearing spectacles, it left a circular and smaller flare on the spectacles, wheres the YN-560 left a squarish and large flare on the spectacles.
-
The Godox is a pretty terrible optical slave. The YN-560 on the otherhand, was a good optical slave, and thus used as the secondary flash for purposes such as rim lighting/side lighting/etc.
-
The Godox is probably better value for money than a portable strobe given its guide number and much smaller size and weight.
-
The Godox, when used with its counterpart Godox trigger, allows you to do hyper-sync. First time I’ve heard of this term and how different it is compared to high-speed sync. Totally blew me off my feet.
Overall, it was great being able to help my friend,Archie, with his shoot. As someone who has always looked up to his works, it’s nice being able to watch him in action.
Hope I’ll get an opportunity to see more local cosplay photogs in action in the near future. It’s really fun helping them, learning from them and watching them shoot. :)
PS. we all got “poisoned” by the Godox after the shoot. It’s just… awesome.
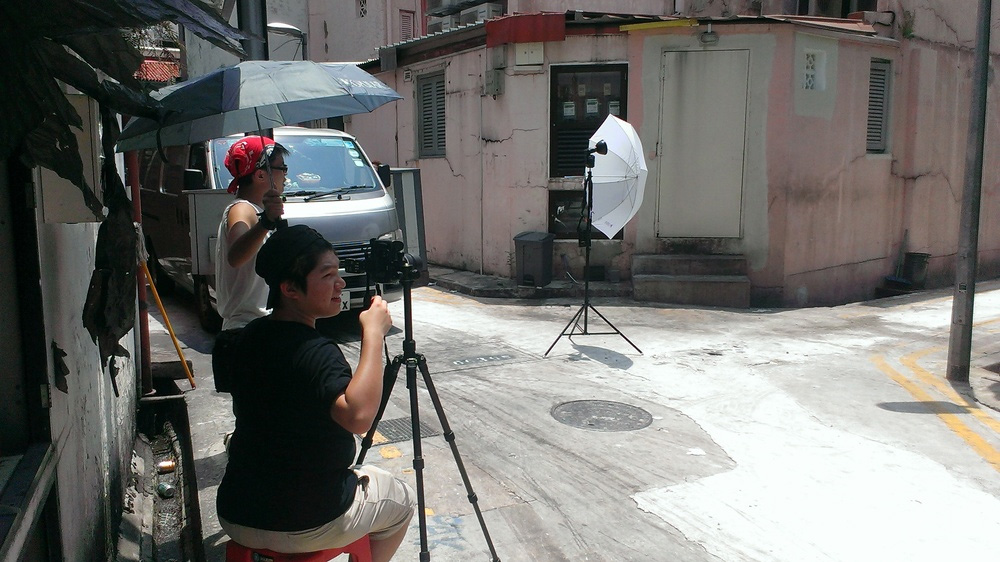
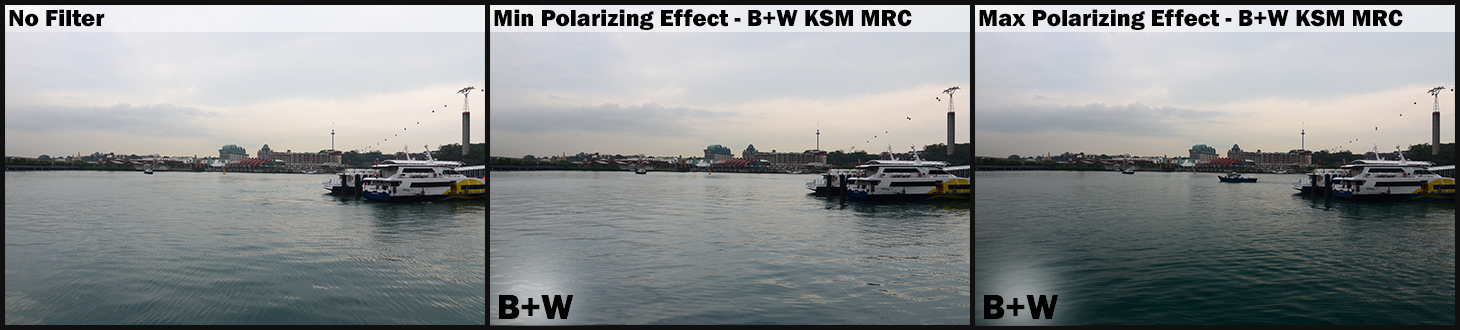
21 Mar 2014
It all started from a mini chit-chat with my colleague, Eric, about CPLs, as he was considering whether or not to buy a circular polariser. The conversation eventually morphed into a “If I buy a B+W CPL, can we ask Jon to sponsor the Chromage CPL in return for a review?”
The outcome: we can borrow the Chromage CPL, but we still have to do a review.
Anyway, we decided to head down to Harbourfront to shoot cranes as well as test out all the different CPLs (Chromage, B+W MRC Slim, and B+W MRC KSM Nano), as well as one which I currently have, the Tian Ya CPL. However, we couldn’t find a good vantage point for shooting the cranes despite shooting since morning. However, the outcome was that the B+W polarisers gave a stronger polarising effect than the Chromage one.
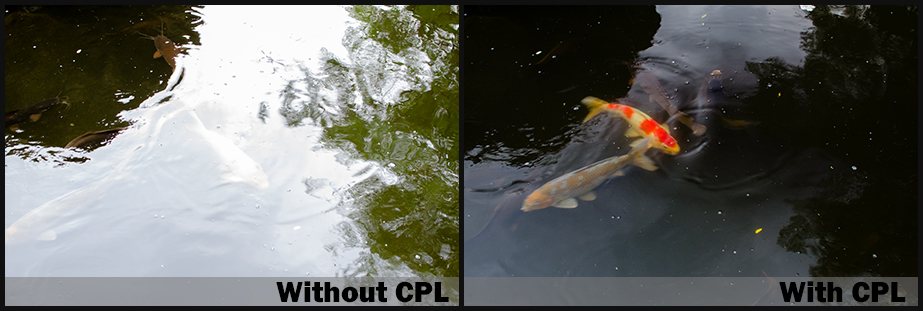
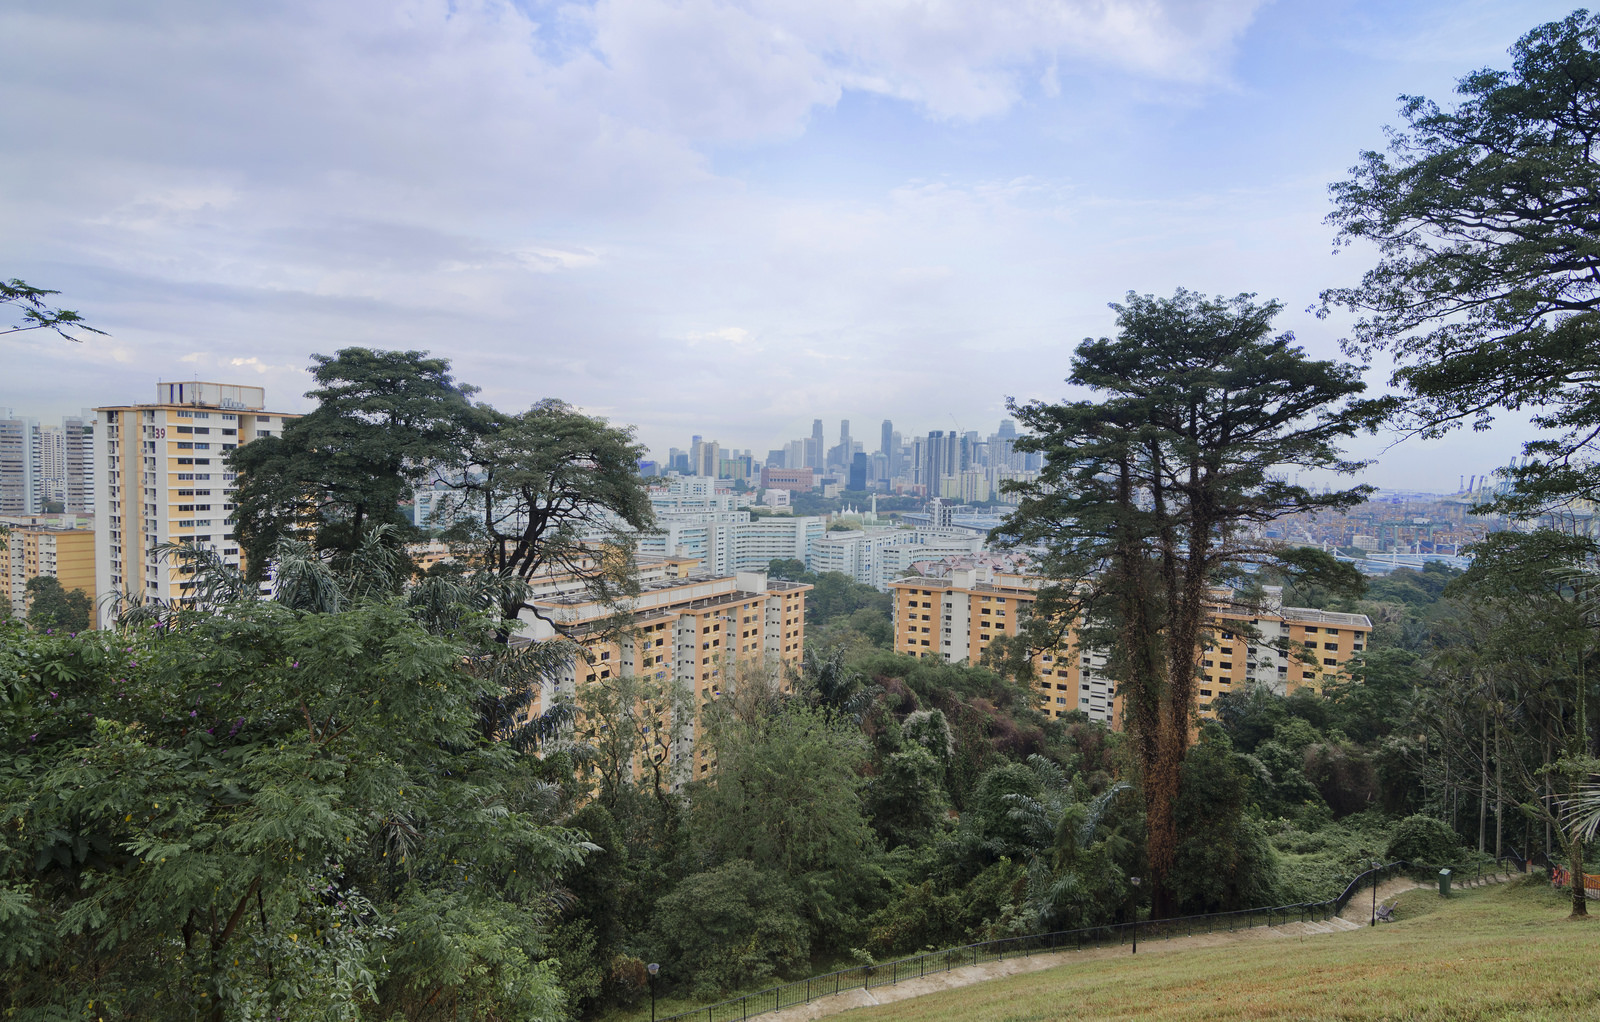
In the end, we climbed Mt Faber Park to the top to take some pictures (no decent results too) in order to play around with the ND filters and Cokin GNDs which my friend had lent to me the weekend before. The photo below was taken with a Cokin GND 8 to darken the skies a little. It was still a pretty good view despite the trees blocking Keppel Terminal and the view of Pasir Panjang.
10 Mar 2014
I’ve always believed that having a strong grounding in the basics will greatly help for more advanced techniques. I’ve done the exact same thing for programming classes.
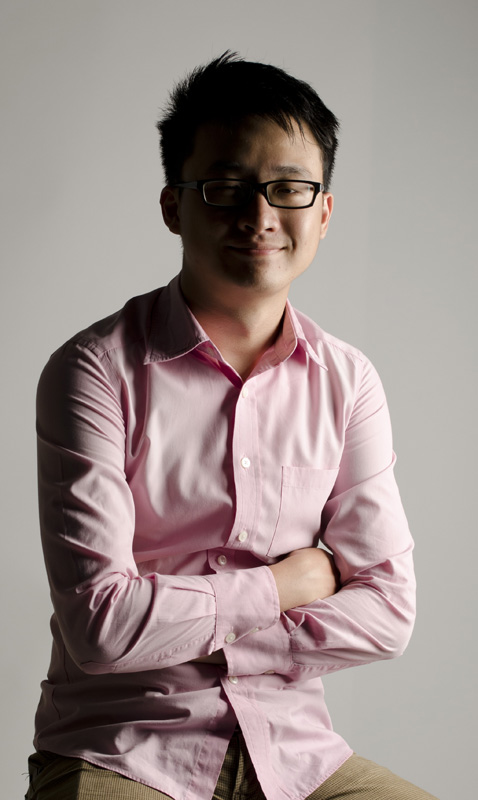
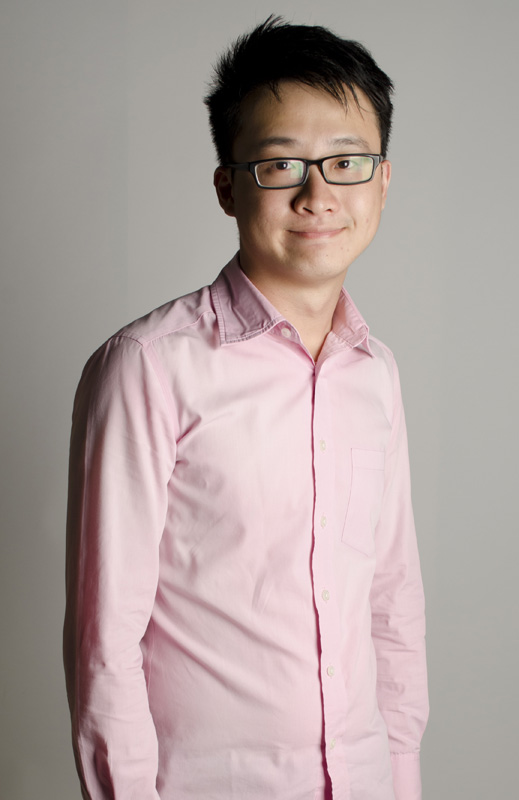
Thus, here are some of the basic studio lighting that I will be covering in this post: Split lighting, Loop lighting, Rembrandt Lighting, Butterfly Lighting and Short Lighting. In all the shots, the strobe was diffused with a large softbox.
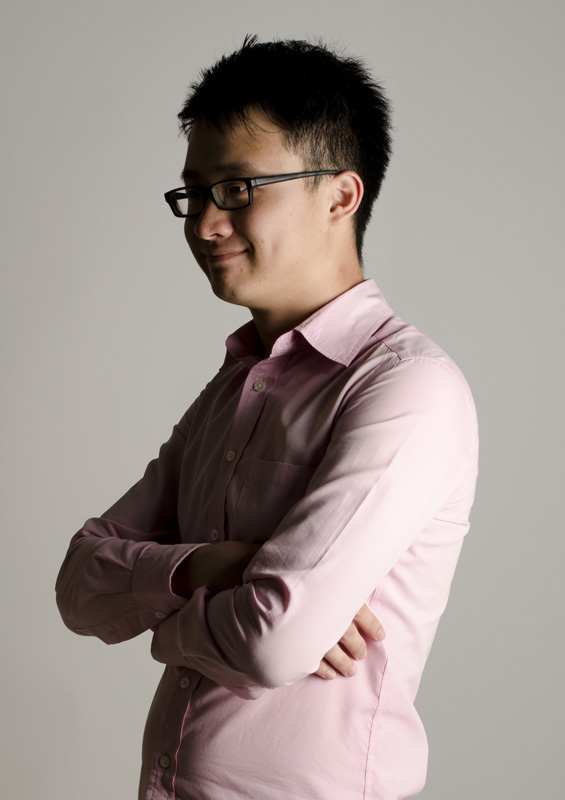
Split Lighting
Only half the face is lighted up with a strobe, lighted from either only the left or only the right side.
Loop Lighting
Light source is about 45 degrees from the camera, slightly above the subject’s eye level. Characterised by the small shadow formed at the side of the nose. Shadow of the nose and cheek do not touch.
Rembrandt Lighting
Unlike loop lighting, the shadow of the nose and cheek touch each other.
Subject has to tilt a little bit away from the light source.
Butterfly Lighting
Strobe is above the subject, pointing down at him. (ie, a top-down lighting)
This lighting is characterised by the butterfly shadow formed under the nose.
Short Lighting
Not really a technique, but more of a style, where the subject faces away from the camera. If only a minority of the face is lighted up, it will be considered as short lighting. If the majority of the face is lighted, then it will be broad lighting.